
Today we will be going over the ThoughtLab Meeting Light Project. Often we find ourselves so busy that we need to set a visual reminder to the team that we need to have a meeting. This is a very simple project, but we wanted it to match our funky décor as well as be functional. For this project you will need a drill, hack saw or pipe cutter, a pipe bender (if you want clean lines), and some screw drivers.
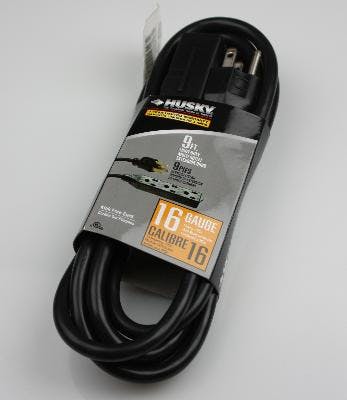
Extension Cord:
For this project we wanted to make sure it was durable and safe to use. We decided on a very heavy duty gauge extension cord with a heavy protective coating that we picked up from our home center.
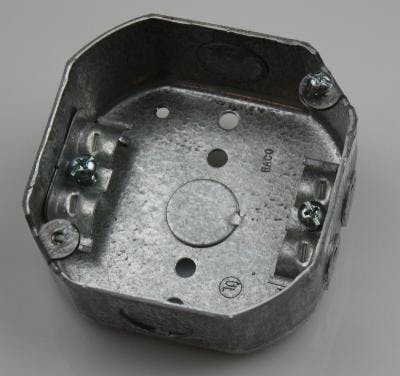
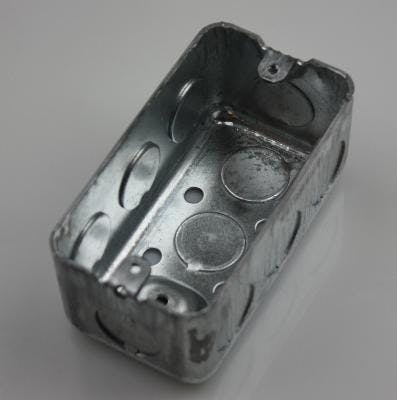
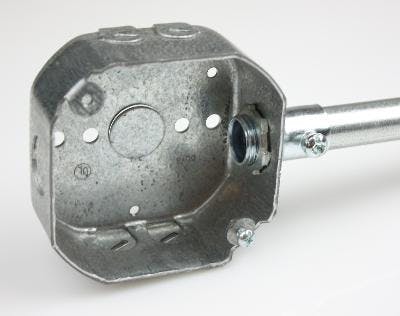
Metal Ceiling Box:
Both due to code reasons as well as aesthetics we chose to use a metal ceiling box for our electrical connections and mounting needs. These are great for a heavy duty look and feel.
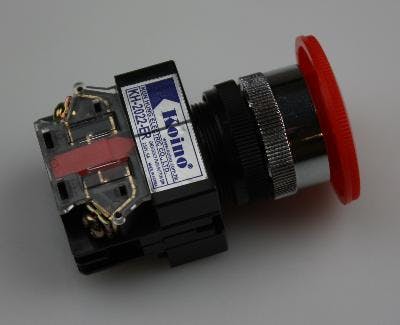
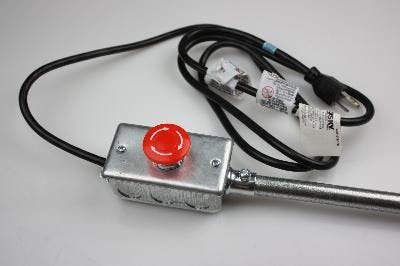
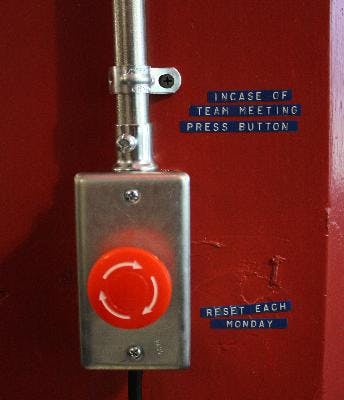
The Big Red Button:
Once again playing off that heavy industrial look, we used a large red emergency kill switch. These are really solid and cost about 10-15$ on eBay.
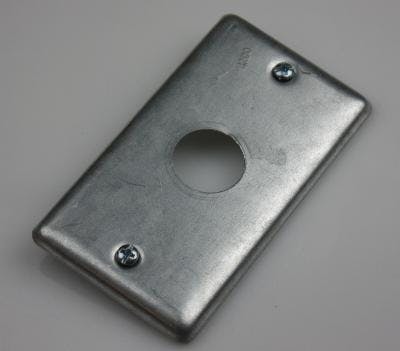
Face Plate:
This is just a typical stainless steel face plate available at most home improvement stores. The diameter is the same size that our button is and you will want to just be careful of that depending on the button you choose to use.
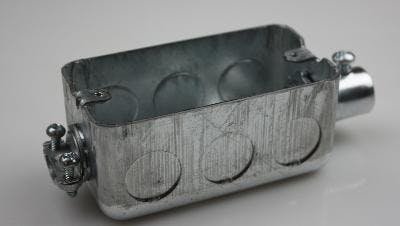
Metal Switch Box:
Again playing off the industrial look we are using an externally mounted, steel, single gang electrical box.

Coupling:
We will be using 2 different types of couplers for this project. One compression-style ½ inch coupler and four ½ conduit-style couplers. The size of coupler you choose should match the knockout ports on the boxes you are using.

Brackets:
We will be using 3 brackets for this project. These simple devices secure the pipe to the wall and prevent it from slipping or moving, as well as lend to that industrial look we like.
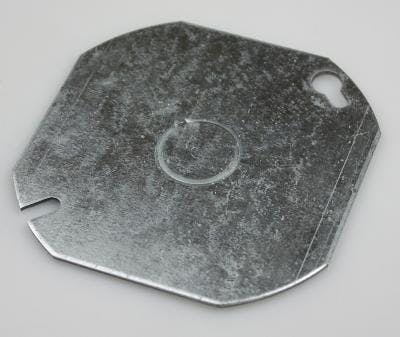
Face Plate:
In order for our light fixture to appear as though it is dropping from the ceiling, we will use this faceplate, knock out the center hole and run a shaft down to the light.
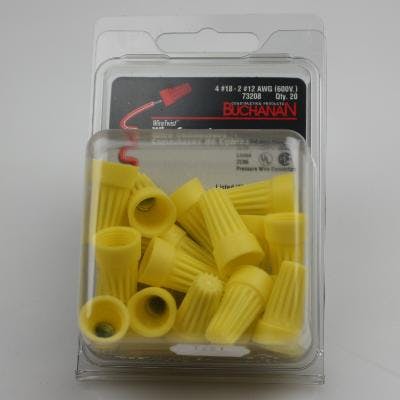
Wire Nuts:
Wire nuts are used to make our electrical connections. If you don’t know what you are doing with electrical circuits please consult a professional.
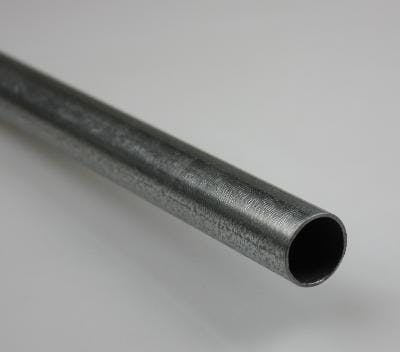
Conduit:
For this project we will be using a portion of a 10-foot length of ½-inch galvanized steel conduit. This will be cut into 2 lengths.
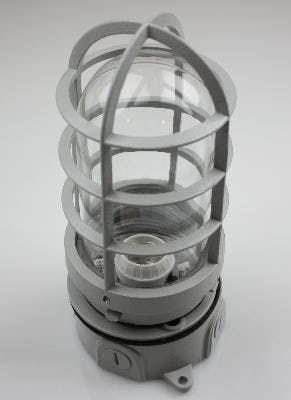
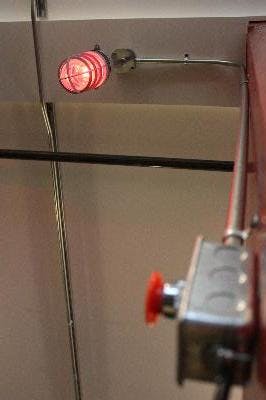
Funky light fixtures:
Yup! This is the one. Great industrial look and not to expensive. You can find these at your local home center in the outdoor fixture section.
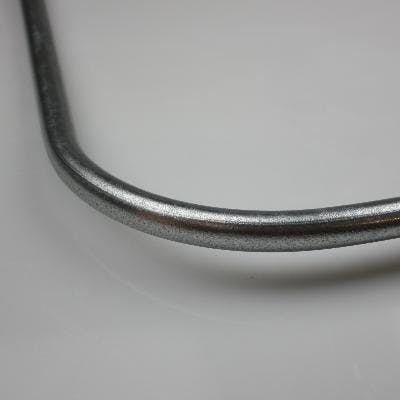
Now we get to start construction. We need to measure the length of pipe we need coming out from the wall along the ceiling and make a bend. It’s a good idea to make your bend a little generous as you can always cut excess length off if it is too long since it’s not possible to undo a bend.
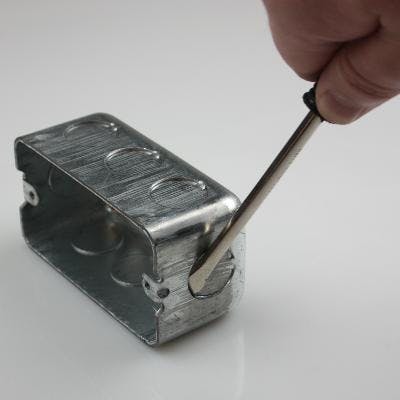
Next we will knock out our holes in the metal boxes. This can be done with a heavy screwdriver and a little love. Use protective gloves if you have them as the edges are usually very sharp all over the box.
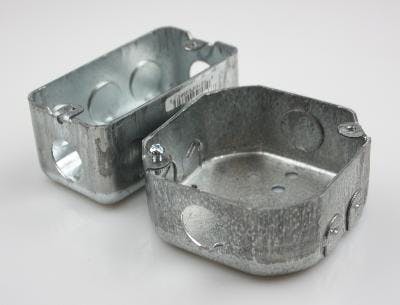
This is what you should have as your end result. Don’t take out more than is necessary.
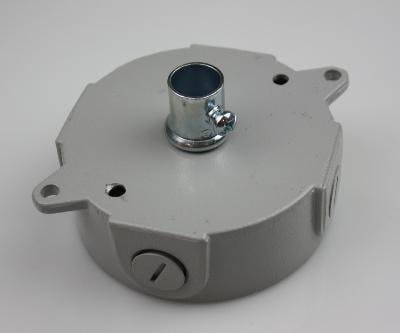
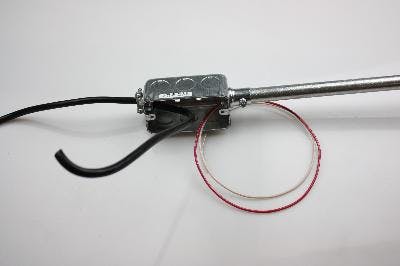
Next we will install our couplers. We will use ½-pipe couplers throughout this project except for this box. The left side is a compression coupler. These simply are inserted through the hole and a nut is fastened on the inside of the box.

Here we have our ceiling mount box with coupler installed. From this view you can see the nut inside the box clearly.
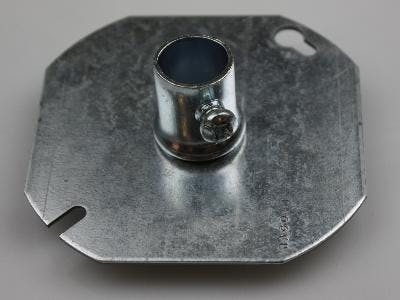
Here we have our face plate with coupler installed.
Now it’s time to start connecting our components. Loosen the screw on the pipe coupler and insert the pipe all the way into the coupler. Then using a good screw driver tighten the screw to lock the pipe into place.
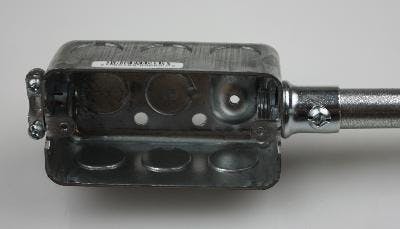
Repeat the process for the switch box. Make sure to note the position of the box relative to the pipe bend to keep things square.
Here we have the base of the light fixture. For this install, the coupler nut is discarded on this model of fixture and simply screws into the pre-threaded hole.
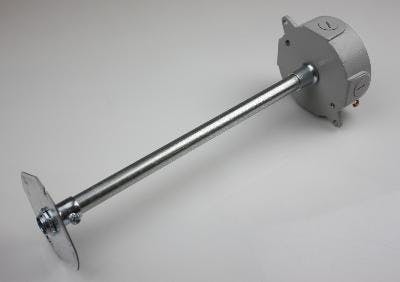
Now we assemble our light fixture's drop pole as shown here using the same techniques as before.
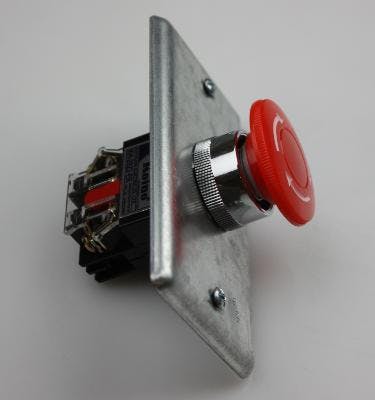
Now onto the electrical for this project. This is a very simple step. The button's head unscrews, as well as the chrome nut, to allow installation into our metal plate. Make sure you tighten everything at this point to prevent rework or unsafe conditions later.
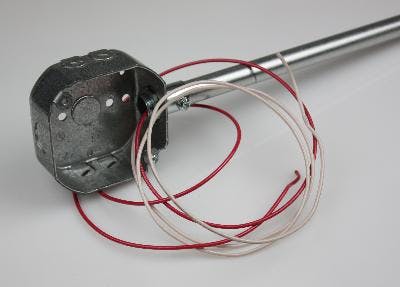
Next we will be running some 14 gauge wire in our conduit from the switch box to the ceiling box. Leave enough that you can run it through the drop pipe and make your connections safely (6-8 inches) hanging out of both ends.
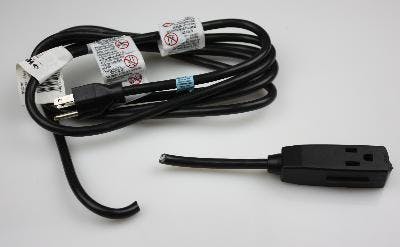
Next we will be cutting off the socket end of our extension cord in preparation to installing it in our box.
Install the wire through the bottom of the light switch box and secure the screws on the compression clamp to lock the cord in place.
Next make the electrical connections for the switch and the lamp. Yep, I am leaving this vague so you have to ask for help (from a professional electrician) if you don’t know what to do here.
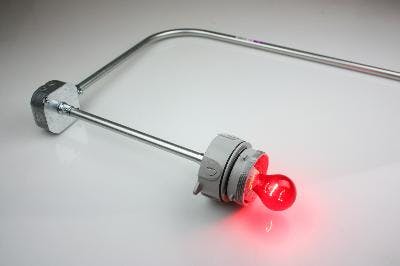
Finally we have a quick test of the lamp and electrical connections. Look--no smoke, sparks or fire!
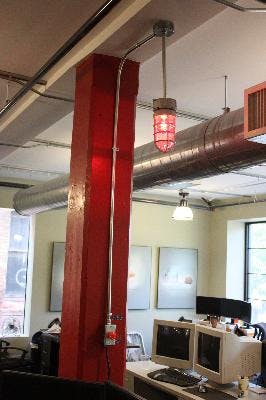
Next up we mount the light. We use the small brackets that fit our ½-inch tubing to hold the lamp in place and then, using a drill and some screws, secured the boxes themselves to the beams we mounted this to.
Mmm smells like project glamour shots to me!
So the finishing touch is instructions. Believe it or not this helped us a lot until we all became accustomed to the light being on… maybe Version 2 will have more laser and siren effects…
