
We Begin
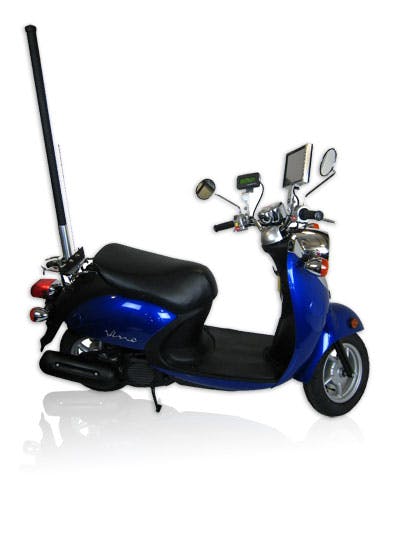
A year ago we had the opportunity to produce a promotional product for one of our clients using a new Vino scooter and some geek know-how. The end result was a rolling system capable of long distance war driving, GPS navigation, Skype calls on the road and the ability to record TV programs so you don’t miss Lost because you are lost. This is just an overview of the project. It covers a lot, but we will be producing full parts lists and how to articles so check back soon!
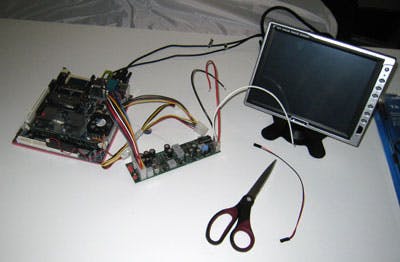
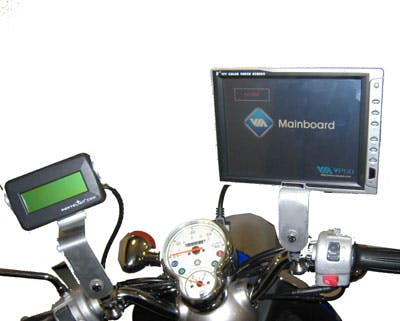
Bench Testing the Computer
The ITX form factor is a great platform to work with because it is small, compact, feature-rich, and consumes little power. Due to the low wattage consumption, we were able to pack a 1 GHZ system into this scooter easily without worrying about the heat output from the VIA CPU.
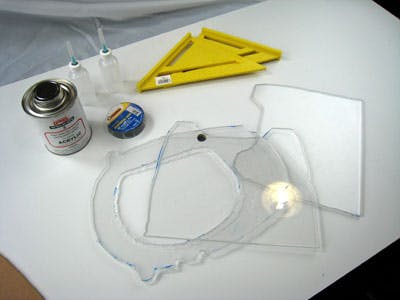
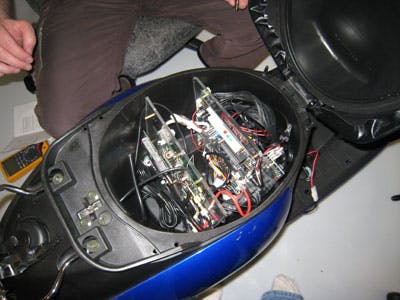
Custom Acrylic Work
This acrylic frame was created for the “Brain Frame” to hold all of the system components. Working with acrylic is very easy with the right tools. It is important to have tools and blades that are specifically made for plastics or acrylic to avoid cracking the material.
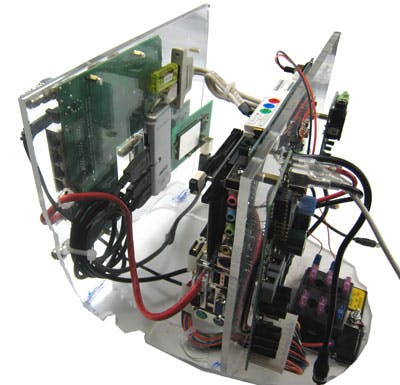
The Assembled Brain Frame
Using this vertical form factor we were able to put a ton of equipment into a small space. Building a lot of servers and systems in house, we always have a plethora of screws and mounting posts left over. Using a 1/8th drill bit, we marked and drilled holes for all the parts and simply screwed a motherboard post into the acrylic. We were able to get the motherboard, power supply, power distribution, access point, FM tuner, WIFI Card, blue tooth, USB hub, USB Camera, electric guitar interface, GPS, LCD readout and PVR TV tuner all in this small space without any trouble.
The Strip
The first major step in assembling this project is the tear down. We literally stripped this scooter down to the frame. Almost every major body part had some custom work done to it to facilitate all the gadgets in this project.
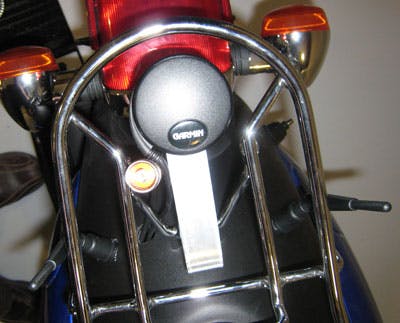
Rear of the Bike
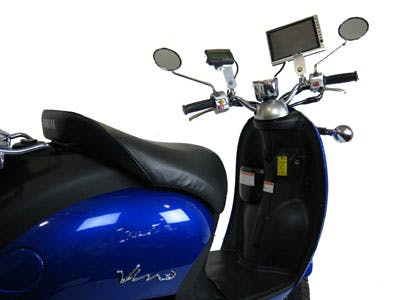
On the rear of the bike we set up the extended wireless access point antennas, the jack for FM antennas, the Garmin GPS antenna and the 30DB gain war driving antenna.
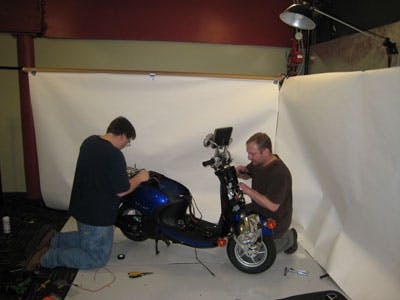
Jared and Kevin Burning the Midnight Oil
This project required two very full days of construction on top of a few other normal daily tasks. Admittedly, it was a very fun and rewarding project despite the long hours.
USB Front Camera
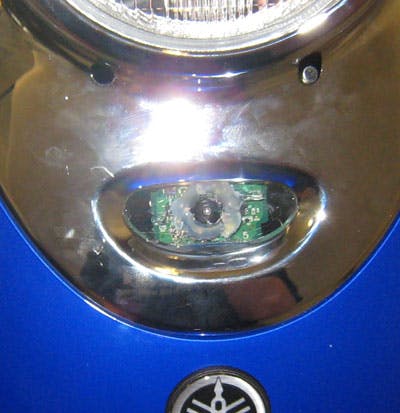
The USB Camera points out of the front of the scooter where the horn would normally be located. We simply changed the angle of the horns mounting arm to give us ample room for the Camera.
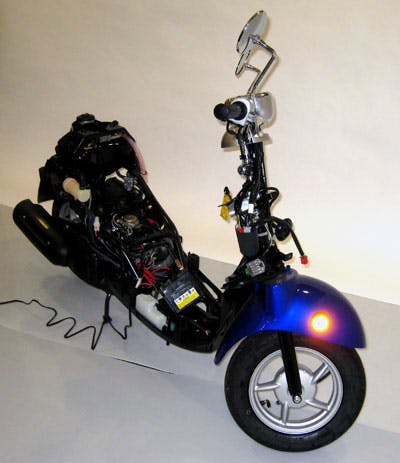
The Main Install
With the modularity of the brain frame, we were able to just drop this into the scooter and start connecting power along with all the accessories and antennas.
Putting the Power to the Test
This is where we always get nervous… It worked on the bench, but will it work now that it’s installed? The Bios on this motherboard has an unusual pause on the post but otherwise everything works flawlessly. Take a deep breath.
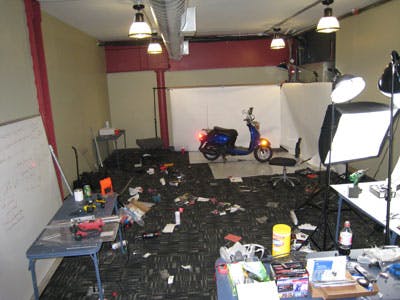
Almost Done
At 1:00AM we finished the project. The furry of drilling, cutting, soldering, heat shrinking and rummaging through a mountain of components more or less left the area a wreck.
Glamour Shot
We had a lot of fun with this building the scooter and getting this teaser blog ready. If you are interested in tackling this on your own, you are in luck as we will be posting a full parts list along with a full how to article here on the ThoughtLab blog!
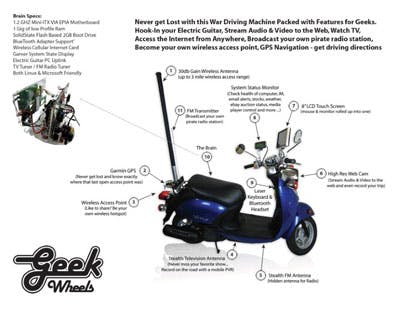
A flyer with all the details of this project. Just click the above image to view larger.