For all you at home audiophiles out there we have a solution! It's very simple. Just follow the steps and you will be fine.
Tap... Tap... Is this thing on?
Here at ThoughtLab we typically focus on Website Design, and Digital Marketing but from time to time we require voice-overs for the videos we produce. When still in the concept phase of video production it doesn't always make sense to rent time in a professional studio just to hear the first draft of your ideas. For those times, and for every other at home audiophile we have a solution!
Today we will be going over the ThoughtLab “High Quality Sound Booth on The Cheap” project. This is a great project if you need a sound booth with excellent sound quality on a budget. Additionally there is a bonus with this simple design in that the sound booth can be collapsed to save space.
For this project you will need a drill, jigsaw, staple gun and razor blade.
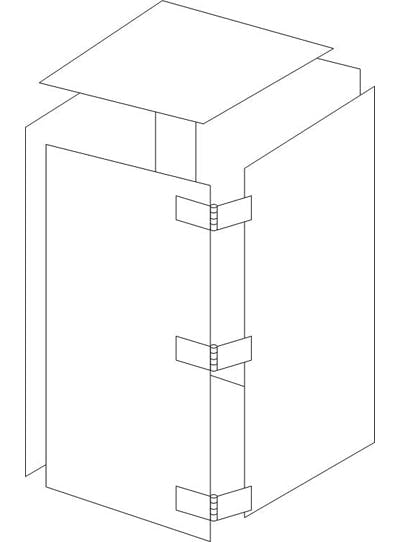
The overall construction of the sound booth is very simple. Here is a simple diagram to clearly illustrate the box layout.
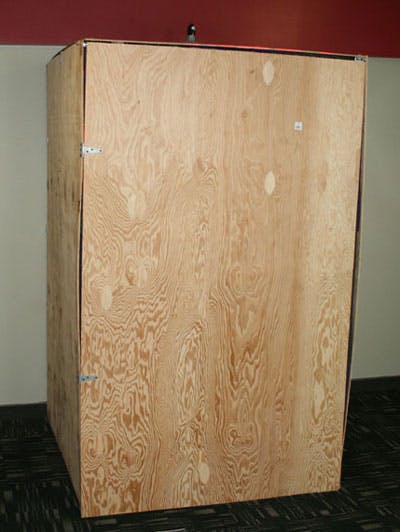
For this project we recommend using 1/2 inch to 5/8ths inch plywood. To save some time you can have your local home improvement store cut the pieces for you. <br />You will need the following pieces cut. <br />4 – 4X6’6” - sides <br />1 – 4’X4’ - top
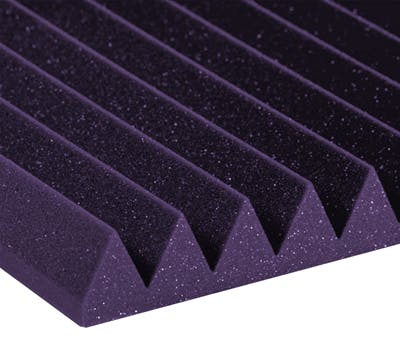
The key component for your sound booths effectiveness will be the sound proofing material. We chose to use an open cell foam based product that is cut in 2’ X 4’ panels produced by Auralex. We picked ours up from Guitar Center. This material can range greatly in price but you can start your booth at about $2.00 – $5.00 per square foot.
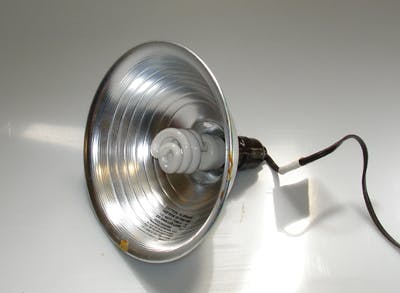
With the door closed the booth gets very dark inside, so we installed a light. To keep with the theme of cheap we used an $8.00 aluminum clam shell light from our local home improvement store. We simply cut a hole in the top, hot glued it in place and used a compact florescent bulb to keep heat to a minimum in our small, enclosed and well-insulated box.
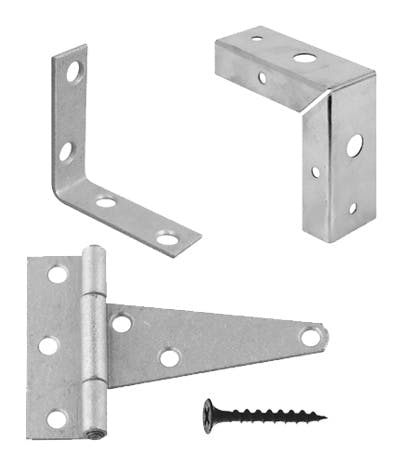
We use a handful of different pieces of hardware for this build that are all easily available at your local hardware store. <br />4 – Corner brackets ($3.50) <br />4 – L brackets ($3.00) <br />2 – gate hinges ($8.00) <br />1 – Box of ¾” Screws ($5.00)

Take the foam panels and use a staple gun to attach them to the board. Most staple guns have adjustable depth to accommodate for different staple sizes. If yours is adjustable you will want to adjust it to leave space for the compressed foam under it so that it doesn't accidentally cut it.
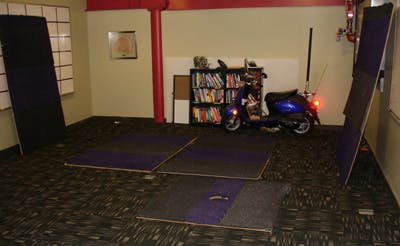
Here we have our panels with the foam attached to them all ready for assembly. If you attach the hinges with the boards laying down it is easier to stand up and assemble.
You can also see our Geek Scooter in the background. Make sure to check out Part 1 & Part 2 of our war driving, Skype Calling, TV Recording Geek Scooter Build.
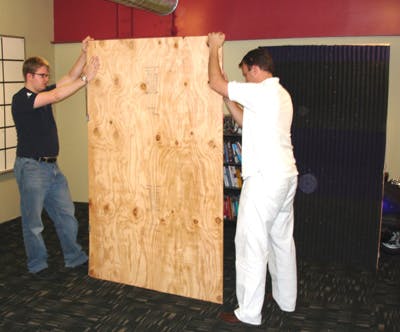
With a few extra hands, stand your walls up and connect them with the L brackets and screws. If the foam is slightly crushed inside it can be fixed by cutting out a small section of one side to allow for the overlap.
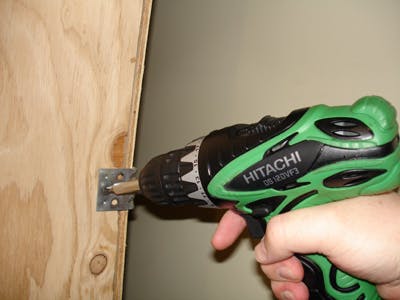
Here we have a picture of the drill screwing the bracket into the wood… Now there is actually a trick to this, screw the bracket to one of the panels by itself first. Then make sure you have accounted for any gap you may need for the other panel. Once that’s done you will likely need to squeeze the second panel into place because the foam is springy. This is where a second set of hands can be helpful.
With all four walls standing, have a person stand in the center and place the top on. The person in the center can hold it up so another person can apply the final screws to hold it together.
Here is the completed sound booth with the top light installed. Make sure you install the light before you put the top on… it just makes life easier.
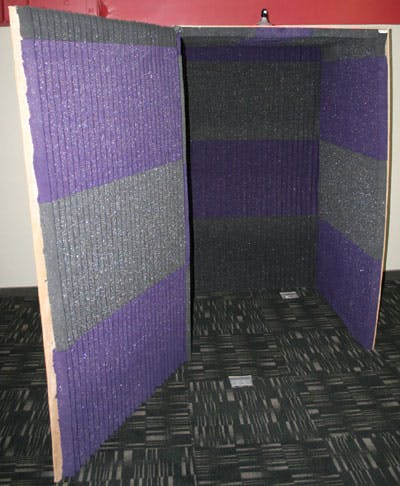
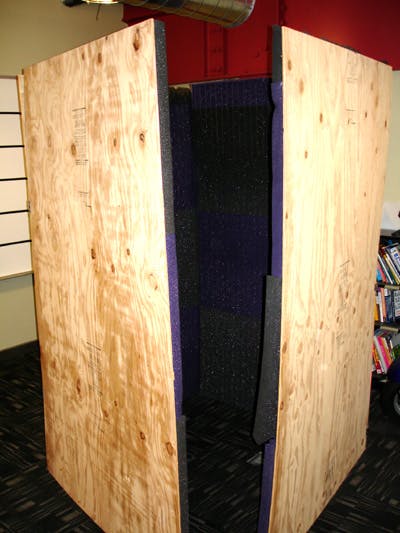
Another shot of the poor man's sound booth. You can see it is actually quite roomy. I suppose if you wanted to save on material cost you could actually do a 3X3 box… but then you'd just get cranky voice talent…
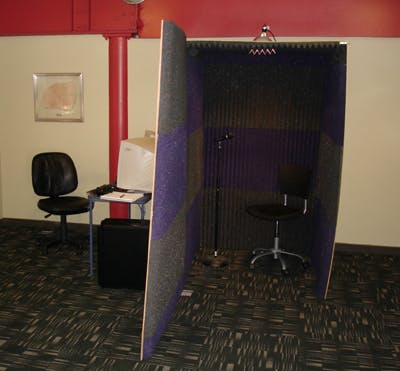
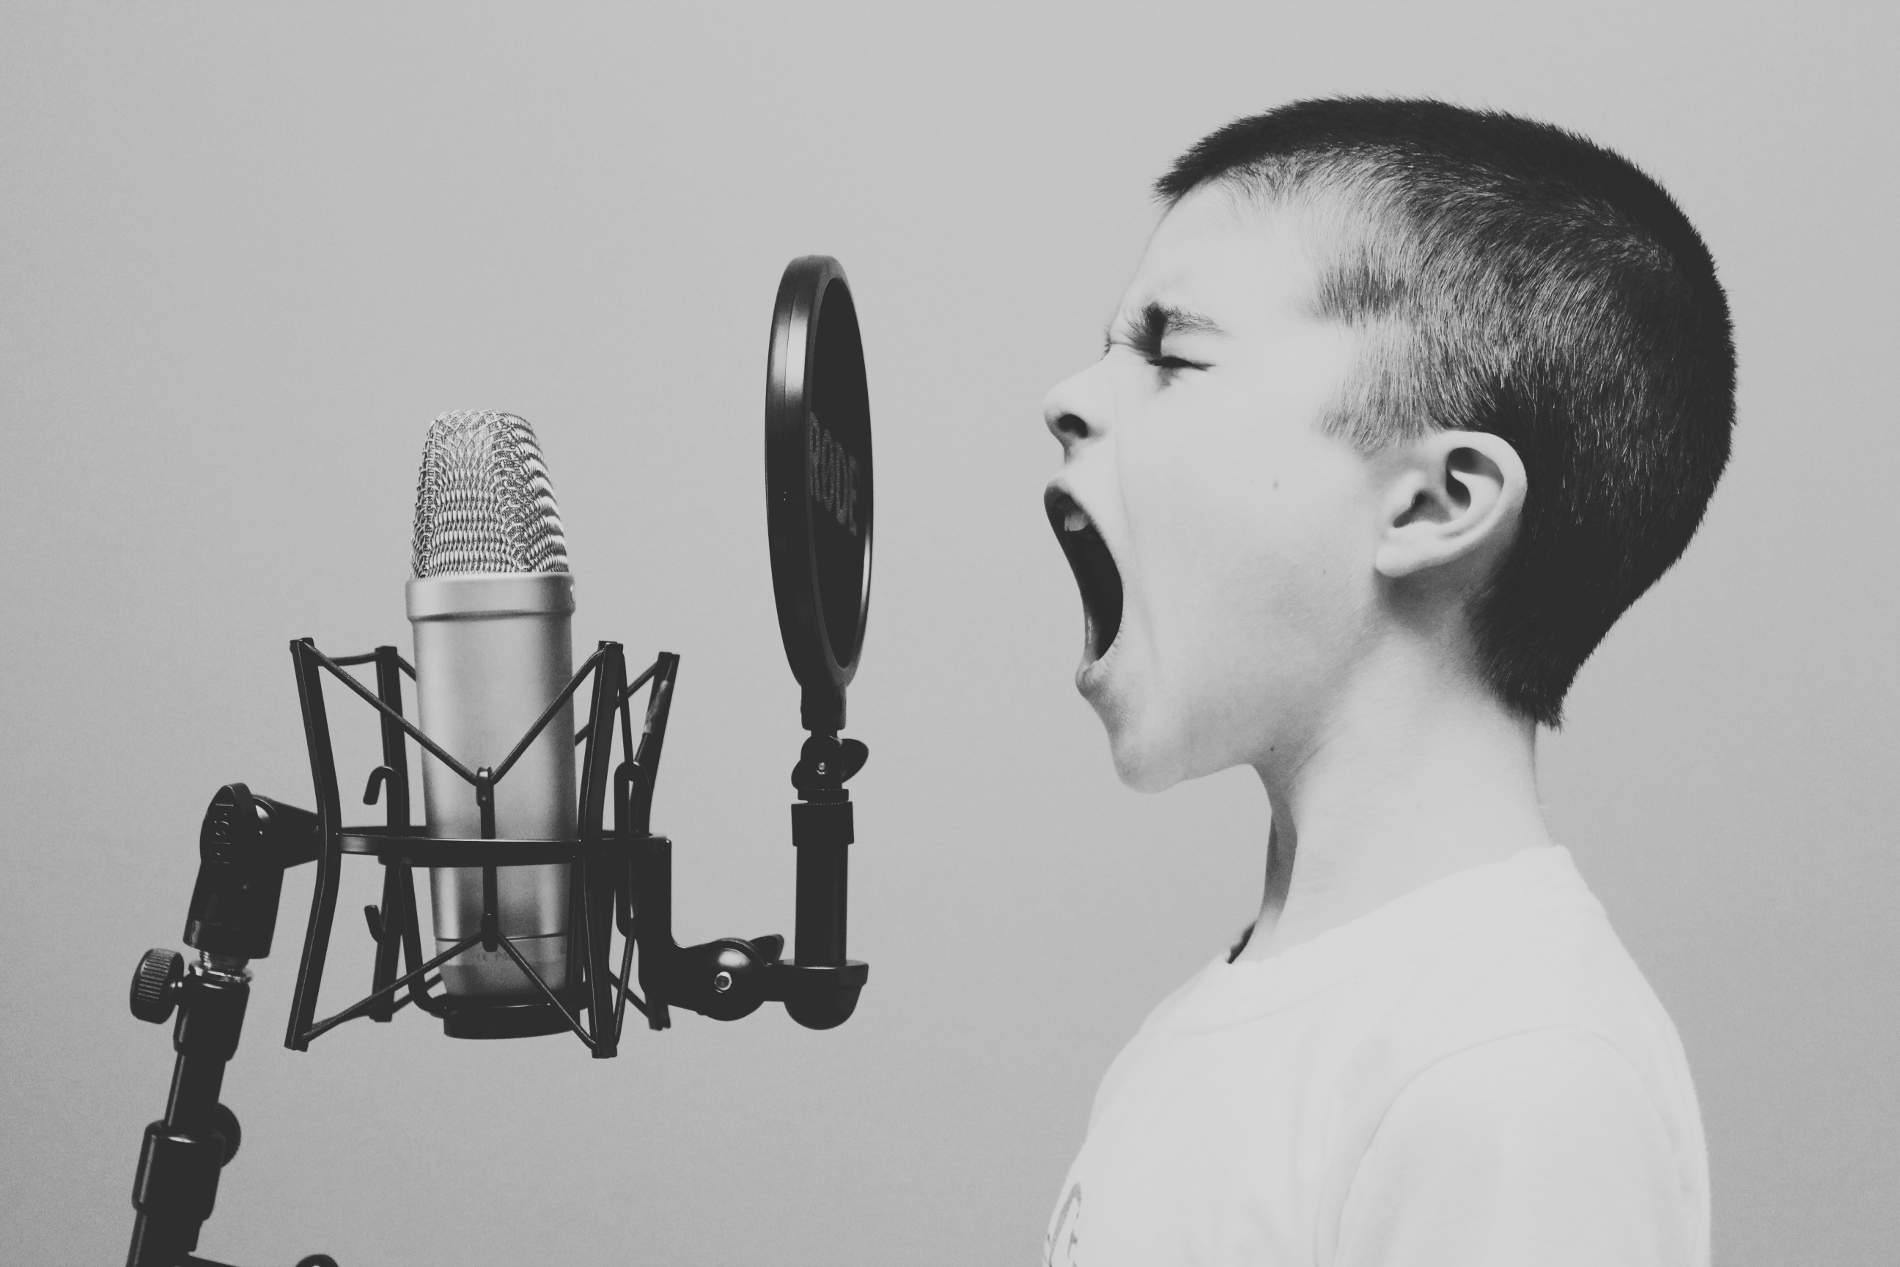
So… next up is to put the sound booth to use. We actually fell in love with Adobe Audition for recording and editing. It makes cleaning up the audio very simple and is user friendly (especially if you are used to the other tools in the Adobe arsenal. One thing to point out is the importance of a good microphone with a good stand and pop shield. This will reduce any noise you get from your voice that could cause the stand to vibrate…
We never claimed Jonathan was a good singer... But he is brave for agreeing to be recorded!
This bad boy officially paid for itself in its first dress rehearsal! We recorded some voice actors for a website we did for Winder Farms. Unfortunately that website has since been lost to the Internet (it was many years ago), but you can keep up with all our new projects on Facebook, and checking out our portfolio. Let us know how your booth turned out in the comments!
Work with us.
Tell us where you want to be. We'll help you get there.